Tuesday, December 11, 2018

Adobe Spark - Now for All Students!

Adobe Spark has always been one of my favorite tools, but up until now, it could only be used by students older than 13 years old.  But now, all that has change!  Adobe has opened all of the premium features up for free for schools. and made the site COPPA compliant for all students.  However, because of the recent change, it is VERY important that District 21 students use the link and directions provided on this document

What can I do with Adobe Spark 

There are basically three different components to Adobe Spark.  Posts, Pages, and Videos. Spark is not the only way that students can create these types of products, but in my opinion it has the perfect combination of ease of use and beautiful products.  They also provide a lot of built in features that keeps students working efficiently and productively

What is a Post, Page, and Video? 

Post: 

A post is a way to make a graphic that can be shared with others.  You can either start with their templates, or start from scratch. Students can add images, text, and filters to make the post more creative. These posts can be printed or shared electronically. 

For more examples, you can take a look at their inspiration page and take a look at this video to get started!


Page

A Page is Adobe's platform form making multi-media pages.  The students can put together words, images, and videos together to create visual stories. There are a variety of layouts that students can use in order to design a creative product that tells a story in an innovative way

You can see more examples on their inspiration page, and use this video to find out more about how to create the page.
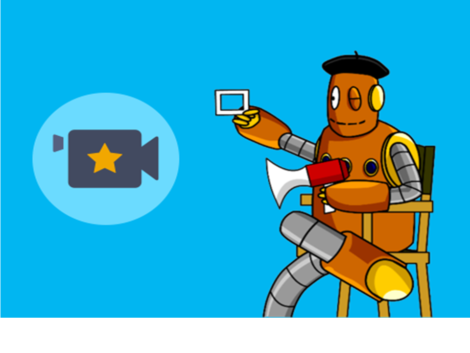


Video 

Adobe also provides a tool to easily create digital stories in the form of video or narrated video.  It is basically drag and drop, and the students can either start from scratch of follow prompts to create a variety of video projects.  Adobe also has built in music and videos that help bring the story to life and create a beautiful story in just a few steps! 

Like the others, Adobe provides an inspiration page and a video to get you started!


What can I do with it? 

Adobe Spark is a very versatile tool that can be used in practically every subject area.  Some examples I've seen already created are: 

  • A video about the Pythagorean Theorum 
And there are many more examples and resources on the Spark Education Exchange

Reminder for D21 Students 

Because Adobe has just changed its policy so that all students can use the service, it is essential that they log using these directions so they don't have issues with the age requirement.  If they do not use the link posted in the directions and follow the directions, they will not be able to access the site. 


Tuesday, October 30, 2018

Helping students recognize "Fake News!"

One of the most previlent phrases that we hear in today's society is the phrase "fake news".  With so many different news sources and ways for students (and adults) to find information on line, it's important to help them learn how to know what to trust.

Here are some resources that can help you and your students:

News Literacy Project 

Probably the most robust resource is the News Literacy Project. It is a non-profit, nonpartisan program that seeks to empower students and teachers as they wade through the vast amount of information out there. 

It provides: 
  • Checkology- A real world experience in which students interact with real journalists and evaluate and interpret the news 
  • The Sift: Emails sent to teachers about recent hoaxes, and rumors with teaching resources for students. 
  • Get Smart about News - Short activities where students can test their news-literacy skills. 
There are many other resources on the site, all of them very well done and accessible for students. 

Common Sense Media- News and Media Literacy 


Common Sense Education is always a go-to for these kinds of lessons, and they don't disapoint here either.  They provide full resources and lessons for: 

And much more, found linked in the site.

Icivics

Icivics also has many resources to help students investigate


In today's age, it is very important that students can find reliable news sources.  It's a hard skill for anyone, but with the right tools, it's definitely possible to learn. 

I'd love to find some more resources, if you have any, please share in the comments!

Tuesday, September 4, 2018

Tour Creator -- the piece that was missing!

As I've used Google Expeditions and the VR Headset, I've found some components that I have really liked, and some that I wish could be expanded. As time has passed, Google has added some nice touches to the Expeditions resources, and I've also begun to use 360 Videos on YouTube so the students could see some virtual reality videos, in addition to the still pictures that Expeditions provides.

But, the one piece that was missing was the ability for the students to (easily) create their own tours.  And, finally, late last school year, Google granted my wish, by launching Tour Creator.  Tour Creator allows students to make their own virtual reality tours, either by shooting their own 360 videos, or by finding 360 videos online.

How could we use it? 

There are many ways students could use Tour Creator in the classroom setting:

  • To create narrative stories, in which the students can record their voice while the  audience follows the narrative in a 360 view. 
  • To create expository stories in which the student tells the story of a historical event, or scientific phenomena 
  • To create tours of locations that other students might need to see, like a tour of of the school for incoming students, or a tour of a field trip that they went on, or a tour of a historical location. 
  • To create explanatory tours, that show skills that other students might need to do, like sports skills.  
And that's just a few of the possibilities!

Overview of how to use it. 


You can see directions with more details on this playlist

Resources: 

Using Tour Builder is really very simple, and basically just drag and drop, but here are a few resources that will help you get started with Tour Creator


Tuesday, April 10, 2018

Breakout!

A few years ago I went to my first Escape Room with a group of friends.  We had one hour to figure out a series of puzzles in order to complete a "bank heist".  It was a ton of fun, and it really made us work as a team, think out of the box, and try various solutions in order to escape (which we didn't!).

Recently, the idea of an escape room has come to schools, typically in the form of a "breakout" project, either for the simple purpose of team building, or for the purpose of team building and problem solving related to a content area.  In either case, they are an engaging, fun addition to your class.

Here's an overview of how you can get started with breakouts.


Breakout Edu 

Probably the easiest way to get started with a breakouts in the classroom is Breakout Edu, a subscription based service.  Breakout.edu makes the task of creating a breakout activity for your class a little less hard. You still need to do the setup and legwork, but the subscription includes plenty of ready made clues and games for almost any curriculum area. And, when you buy the kit, it also comes with the various locks and tools that the student might need. In addition, on the site, there are community created breakouts that are free to anyone and digital breakouts that use the same concept, but the locks and clues are all "virtual". The site also provides many resources, including videos and tutorials that will help you and your students.


There are many more resources out there to get started, here are a few that I found the most useful. 

Create a Breakout Experience 

In order to "take it up a notch" teachers and students can also design their own game.  This would be a good second step after the students and teachers have had experience going through the process and seeing how the puzzles work.  

Here are a few resources for creating your own Breakout Edu


If you're looking for a new, fun way to review information or do some type of group/team building, definitely give classroom breakouts a shot!

Wednesday, February 21, 2018

Slideshows, Been there, Done that, Now what??

One of the requests I hear often is for ideas for tools students can use that are new and different.  When asked to create something to show what they've learned or investigated, students often choose-- A Slideshow.  Why? Because it's quick and easy....and, they've probably been doing them since 3rd grade! So, now it's time to move on to something new!  Here are a few ideas for your students to try-- to move past the slideshow.

Book Creator 

Book Creator is exactly what it sounds like, a way for students to create multimedia books in order to share their learning or creations.  The students can either share a narrative story of their own, or find a creative way to share what they've learned about a topic they investigated.  I found it relatively easy to use, and students will have no problem intuitively adding text, pictures, colors, and even their own recordings. 

Here are some resources that will help you and your students

PowToon

I often refer to PowToon as a"slideshow on steroids".  It is a great way for the students to unleash their creativity while informing their audience of what they want to share.  Students can easily create animated slideshows with a variety of characters and backgrounds.  

PowToon has a free and a paid version, with the paid version offering more "bells and whistles" but the free version being more than enough for students to have fun and get their message delivered. 


Here are some resources to help you get started with PowToon

Possibly one of the most exciting new tools that I've seen recently is Adobe Spark.  Spark has three major components, Post, Page and Video.


Adobe has made the incredible move  (beginning April, 2018) of making all of it's premium services free for  students and educators, (and making the service COPPA compliant even for students under 13 ), using Adobe Spark is a no-brainer.  It's the trifecta of being a quality product that is intuitive AND free!

There are a million ways students can use this tool. Everything from digital storytelling, to creating a meme that summarizes or persuades, or even a dynamic webpage.  I have just begun to use Spark, and it's already one of my favorite tools.

Even though the program is relatively intuitive, here is are a brief video that shows how to make a page, video, and post. It's fun!

Podcasting 

Podcasts have been very popular for a while now, and even having students listen to some commercially produced ones can be a useful way to have them understand different concepts.

In addition to that, students can create their own podcasts. They can "interview: characters in books or historical figures, reenact scenes, or record narrative stories or poems.  

There are many tools you can use to have the students podcast.  Probably the most simple is Garage Band, if you have Apple computers. Otherwise, some of the apps that seem to work best for Chromebooks are Twisted Wave, and Beautiful Audio Editor. 

Digital Storytelling

In its simplest form, digital storytelling is using a combination of pictures, sounds, and words (written and spoken) to tell a story. Most people think of digital storytelling as a way for student to tell their own narrative story in a in a video form.  And in reality, that's probably the most powerful form of digital storytelling. However, digital storytelling can also be used to tell explain, or to share an opinion about any topic a student is learning in school, and the projects can be incredibly powerful.

Digital Storytelling can be used to tell a personal story, to cause action, or to inform others about a topic.  If you'd like to know more about digital storytelling, I went into more detail in my  previous Digital Storytelling post.

Other Options

There are many other ideas for students to use to show their learning, so if you're looking for other options for creating, take a look at these posts:

One caveat for any of the tools you might be interested in using- it is important to check the terms of service/COPPA compliance before using a new tool.  Once you've found one that you like, it's a good idea to double check with your tech department of your school! (The ones listed on this post, are all approved for K-8 students)


Tuesday, January 16, 2018

So you think you know Brainpop? You might be surprised!


Maybe I'm the last one on this bandwagon, but recently I logged into Brainpop and was shocked by all the new (to me) features. Years ago, BrainPop was a good tool for launching topics or reviewing concepts. But, boy have they added some incredible tools!


In this post, I'm going to highlight some of the features that I thought were particularly intriguing. However, I'm not going to go into the details of how to use these tools, because the Brainpop Educators Site does it far better than I ever could. It also provides screencasts, student resources, and lesson ideas.


One disclaimer, to use many of these tools, you do need a personal account, and this video shows you how to do that. (You'll need an educator code, which can be gotten from your account administrator). Your students also join your classroom so they can participate in these activities. This also allows you to and create assignments and track the students' progress.


And now.... here are the top 5 tools:


5) Make a Map-


Students can create concept maps while (or after) watching the
Brain Pop videos. The students can even take screenshots of the videos as their watching to add to their concept map.


4) Newsela


Each subject area is automatically linked to a related article in Newsela. You can assign the news article to an entire class, or choose certain students within the class. For now, it looks like all of the students initially will get the same reading level as a default, but you can instruct them to choose a different level once the have opened the article.


3) Brain Pop Challenge-


Brain Pop Challenge allows the students to review the material from Brain Pop in a variety of ways (concept mapping, diagram labeling, matching, multiple response, sequencing, Venn diagramming, and highlighting). These challenges can be used as a review or they can be used as an assessment. When they are used as a review the student is given automatic feedback so they can correct their responses. When they are used as an assessment, the responses are stored in the teacher's classroom.


2) Creative Coding-


After learning about the Brainpop content, the students can use coding to create a meme, doodle augmented reality, stop motion animation, or newscast. All of these projects are done in Java script and brainpop provides PDF step by step tutorials to help the students. This would be a great extension activity for students!


And the # 1 feature (at least in my opinion!)

1) Make a Movie -


In my opinion, one of the coolest features of BrainPop now is the ability for students to make a movie. There are many (but not all) topics that allow students or teachers to use the information that they have learned (through BrainPop or elsewhere), and create a fun resource for others to learn from. Again, Brainpop provides many different resources to help the students and teachers learn how to create.


Odds and ends


BrainPop has definitely evolved into an even more robust learning resource. There are countless aspects that can be useful in the classroom, too many to mention here. But, when you to the BrainPop educators page, be sure to take a look at its ability to filter lessons by learning standards (even down to the state level), digital citizenship resources, and FYI high interest articles.


BrainPop has done a fantastic job of taking a good resource and making it even more exciting! I'm looking forward to trying some of these ideas out with our students.

Wednesday, December 13, 2017

Digital Storytelling--- Tell a Story, Show your Learning!

 In its simplest form, digital storytelling is using a combination of pictures, sounds, and words (written and spoken) to tell a story. Most people think of digital storytelling as a way for student to tell their own narrative story in a in a video form.  And in reality, that's probably the most powerful form of digital storytelling. However, digital storytelling can also be used to tell explain, or to share an opinion about any topic a student is learning in school, and the projects can be incredibly powerful.

What's so special about digital storytelling?


When a student creates a digital story, whether it be their own story or a content based story, it forces him/her to think about the topic in on various levels.  They need to visualize the topic and find the perfect pictures, they have to write the script that will accompany the pictures and present the words in a way that perfectly emphasizes what they think is important, and they need to find music or sounds that will highlight the story in the correct way.  


How could they use this in the classroom

Digital storytelling could be used in practically any content area. For example a teacher might decide to use it:

So, what do they do? 

Write the narration

Before the student even begins working on a digital story, they need to write the narration that goes with it.  If this is a narrative story, often they have written this ahead of time. But, if it's a content based story, they would use their research to create the narration that will go with the story.

Storyboard 

After the student has created the narration, they need to plan out a storyboard. The storyboard helps the student to think about the music and pictures that help to tell the story.  You can make a storyboard that suits your need or it is very easy to find templates online.


Images

One of the most important aspects of the digital story is what the viewer is seeing. Students can either use a camera to take pictures that tell the story, use personal pictures, or find fair use pictures online.  

It is very important to talk to the students about fair use and copyright when they begin to look for pictures. Here are a few resources to help the students to find fair use pictures:


Putting it All Together

Students can use any number of tools to glue the components together. At our school, each student has the WeVideo app on their Chromebook (which allows for sharing and collaboration) but really any video editing tool  can work.  

The power of a digital story is that it combines the visual and auditory components of a story to really pack a punch. A story that is impressive in written form can become downright breathtaking given the right mix of sights, sounds, and expression.

Give it a try, and see the power of digital storytelling!


Adobe Spark - Now for All Students!

Adobe Spark has always been one of my favorite tools, but up until now, it could only be used by students older than 13 years old.  But now,...